Can I please replace those white melamine countertops?
Last July, I moved into a new place. If you haven't followed my adventures, I spent 2 years traveling around and experimenting with a nomadic lifestyle. As much as I had a really great time, the idea to find myself a homebase rapidly grew in me. There is something conforting knowing you can take a break from the backpack lifestyle and that there is a place you can call home and come back to whenever you feel like it. So I went on a quest to find myself a homebase in Montreal. It is usually a rather easy to rent an appartment in the city. But being me, I decided to be overly picky. Nine months later I finally found the place.
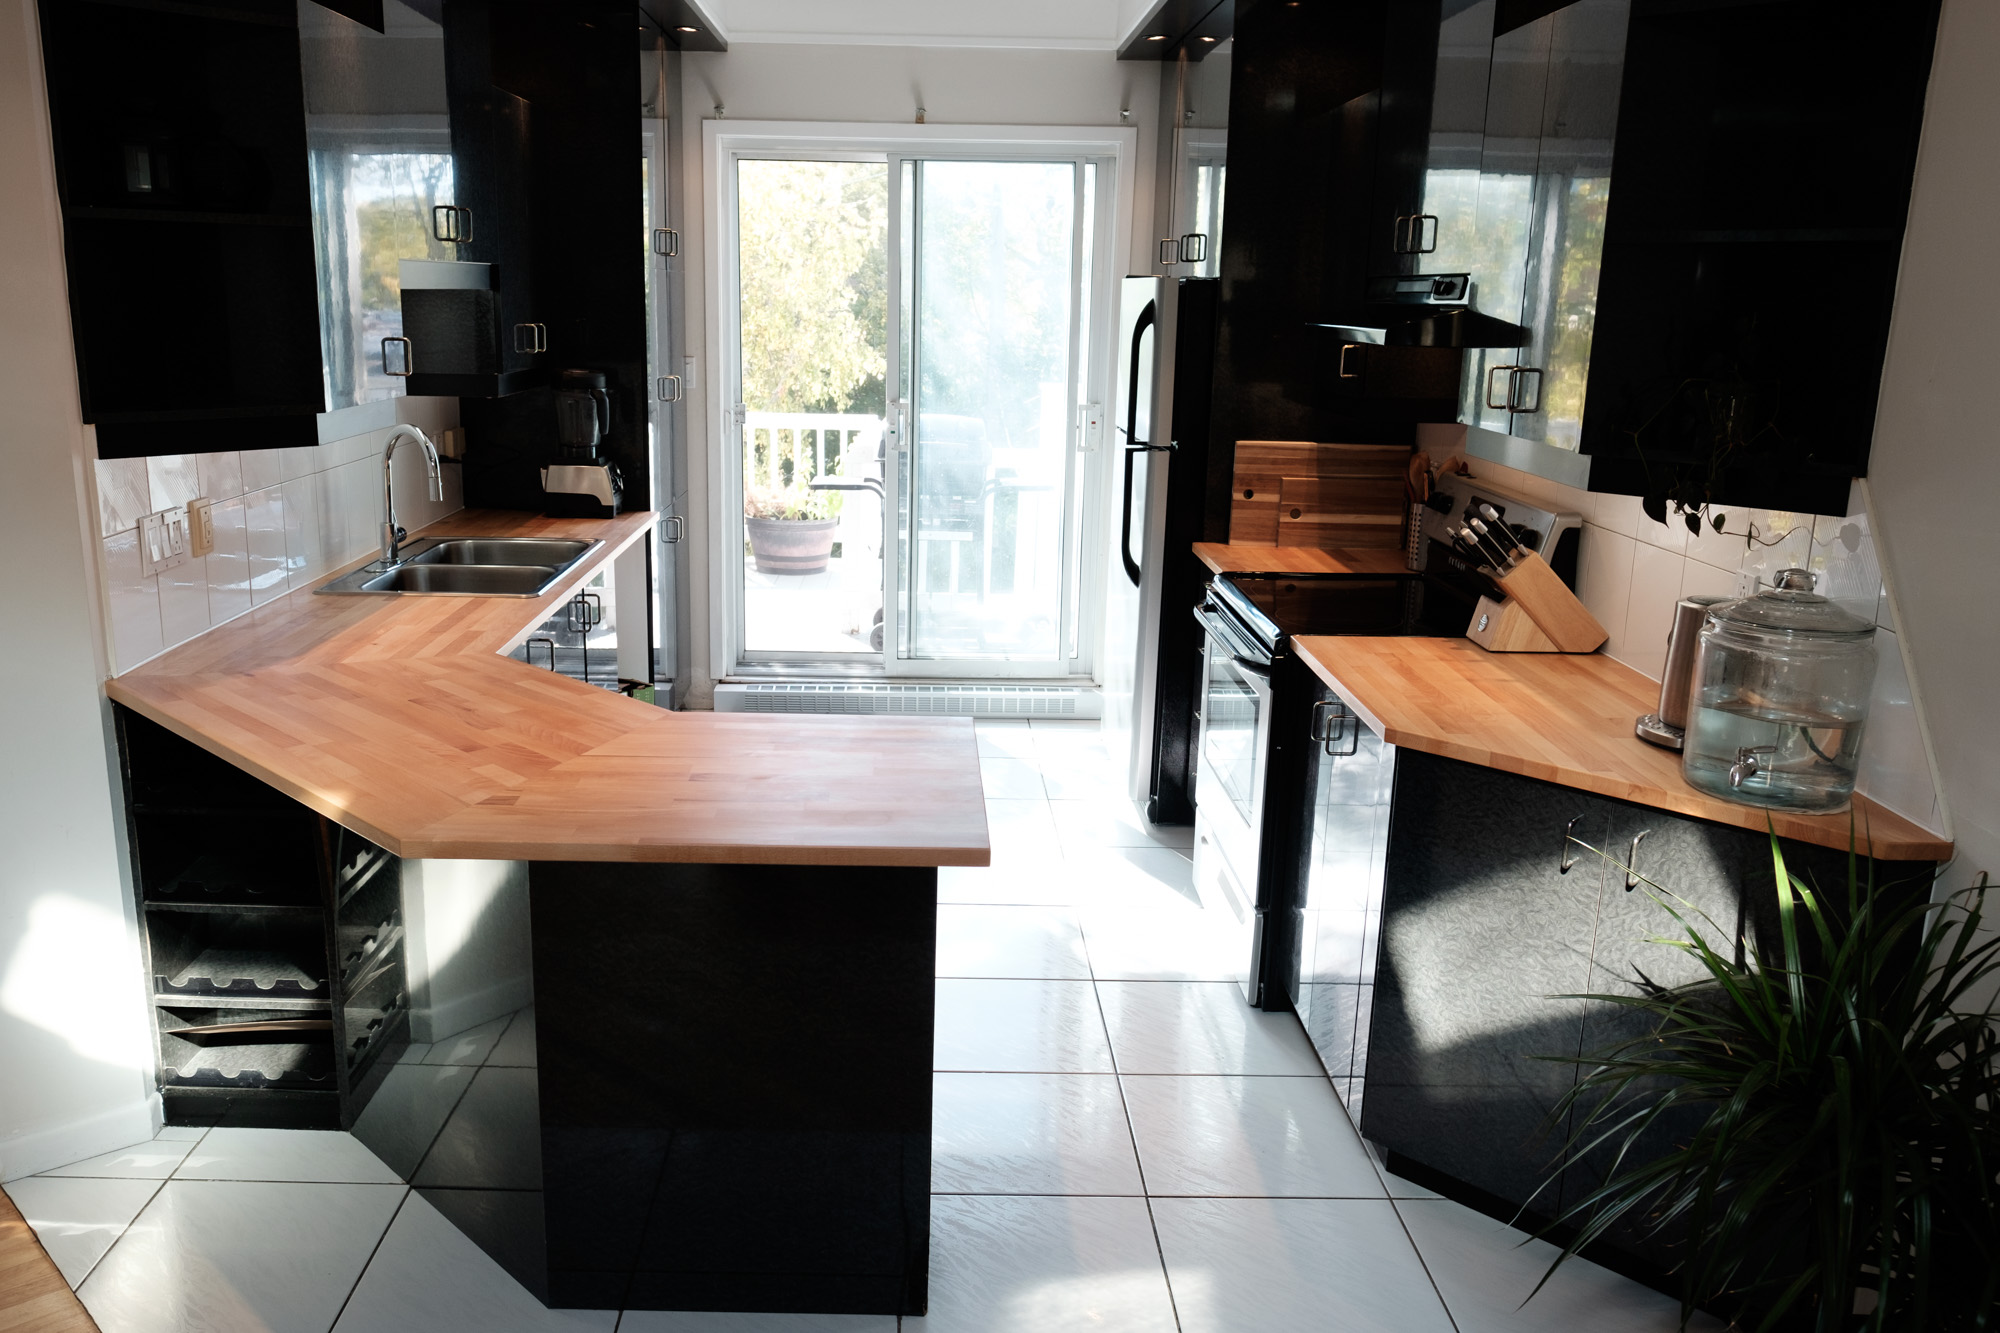
I love everything about that apartment but the kitchen melamine countertops! Ok that's a lie, there are other things but they will be the subject of other articles. Back to the melamine. I don't like melamine! The banding and veneering always break or fall apart. I can deal with the black cabinets you see in the picture but the solid white countertops were really too much. I wish I could show you but I lost the pictures I took prior the renovations. It seems like the SD card itself couldn't take it! It fried and died on me. You will have to take my word for it, it was ugly and falling apart!
I offered my landlord to replace them if he paid the materials. He agreed! I didn't get unlimited funding but enough to get Ikea HAMMARP countertops. You may wonder why a woodworker would get his wooden countertop from Ikea? Because it is cheap. Cheaper than making them, cheaper than anywhere else. You gotta love Ikea for that.
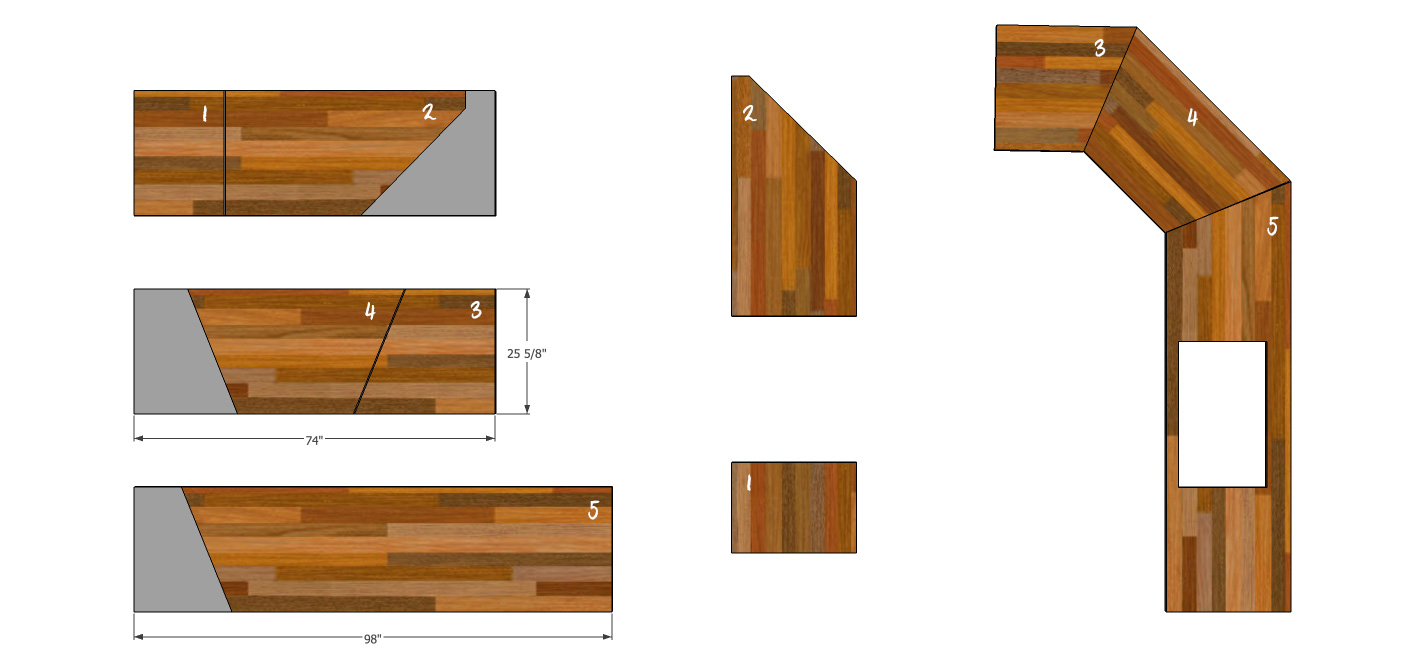
I bought 2 small (74 inches) and 1 big (98 inches) countertops. As you see above, with couple cuts, I got the final design. The grey zones are "waste" (that I kept for a future project).
To assemble the angles of the main section (part 3, 4 and 5), I used Festool Dominos (aka improved dowels) and some tite joint fastners. The Dominos allow perfect alignment of the pieces and prevent the two parts being assembled from sliding. The fastners... fasten the pieces together and keep them from moving apart.
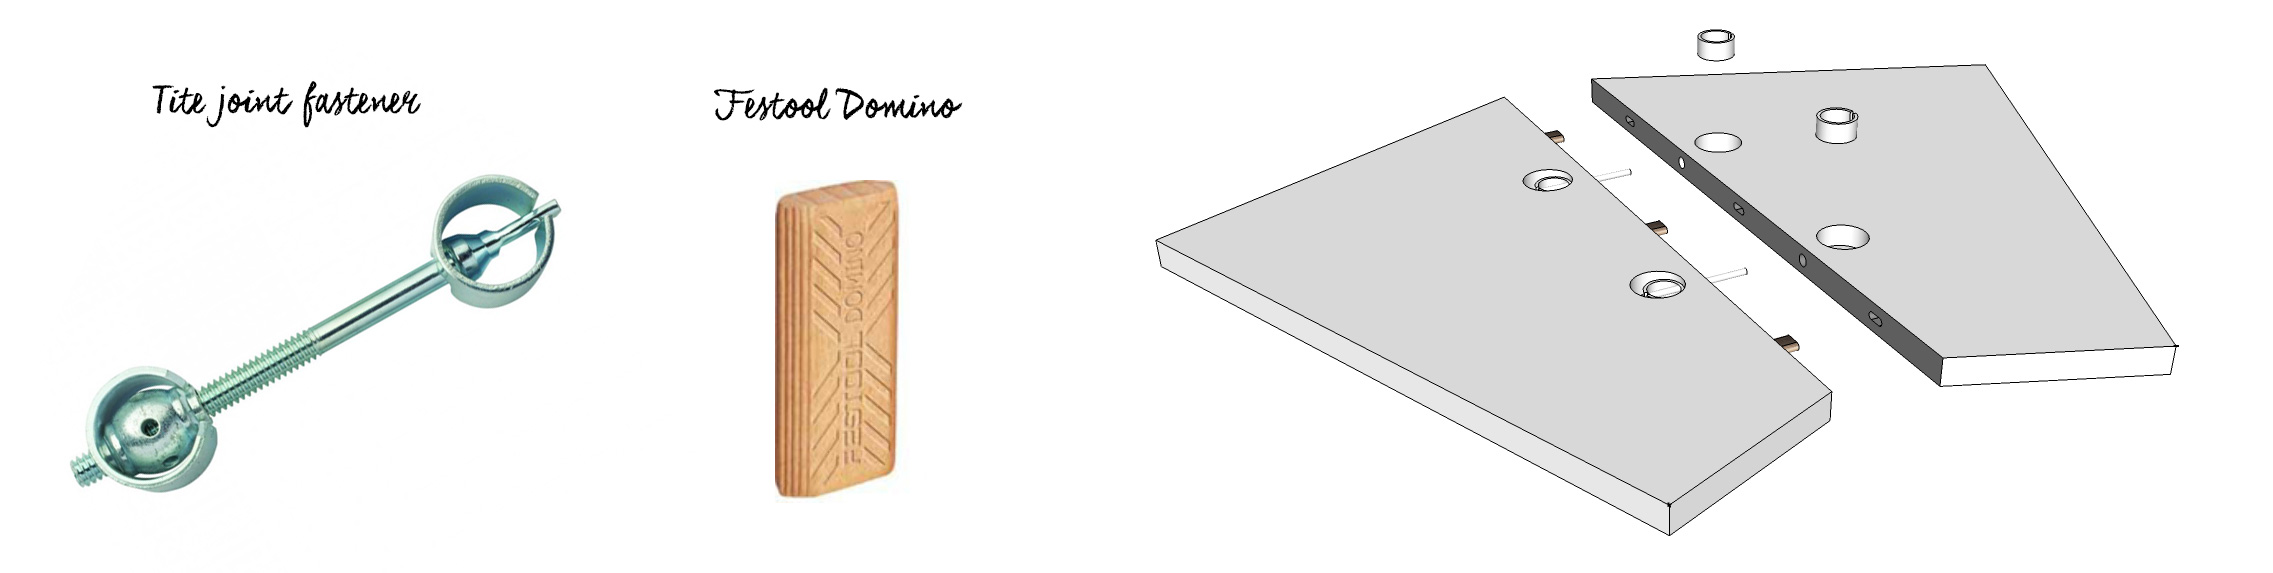
It was the first time I used this combination and was really curious how it would turn out. I have past experiences of doing glue up assemblies on site and they never turn out well. And I couldn't glue the countertop at the shop and move it since it would have been simply too big. Since there is no glue involved, I dry fitted the pieces at the shop, disassembled it all and reassembled it one last time on site. Once installed, I added some wood filler in the barely visible gaps created at the joint, sanded it flat and added 3 coats of Livos Countertop Oil. If you've read my other articles, you must start to know I like oil finishes and how they make the wood grain pop.
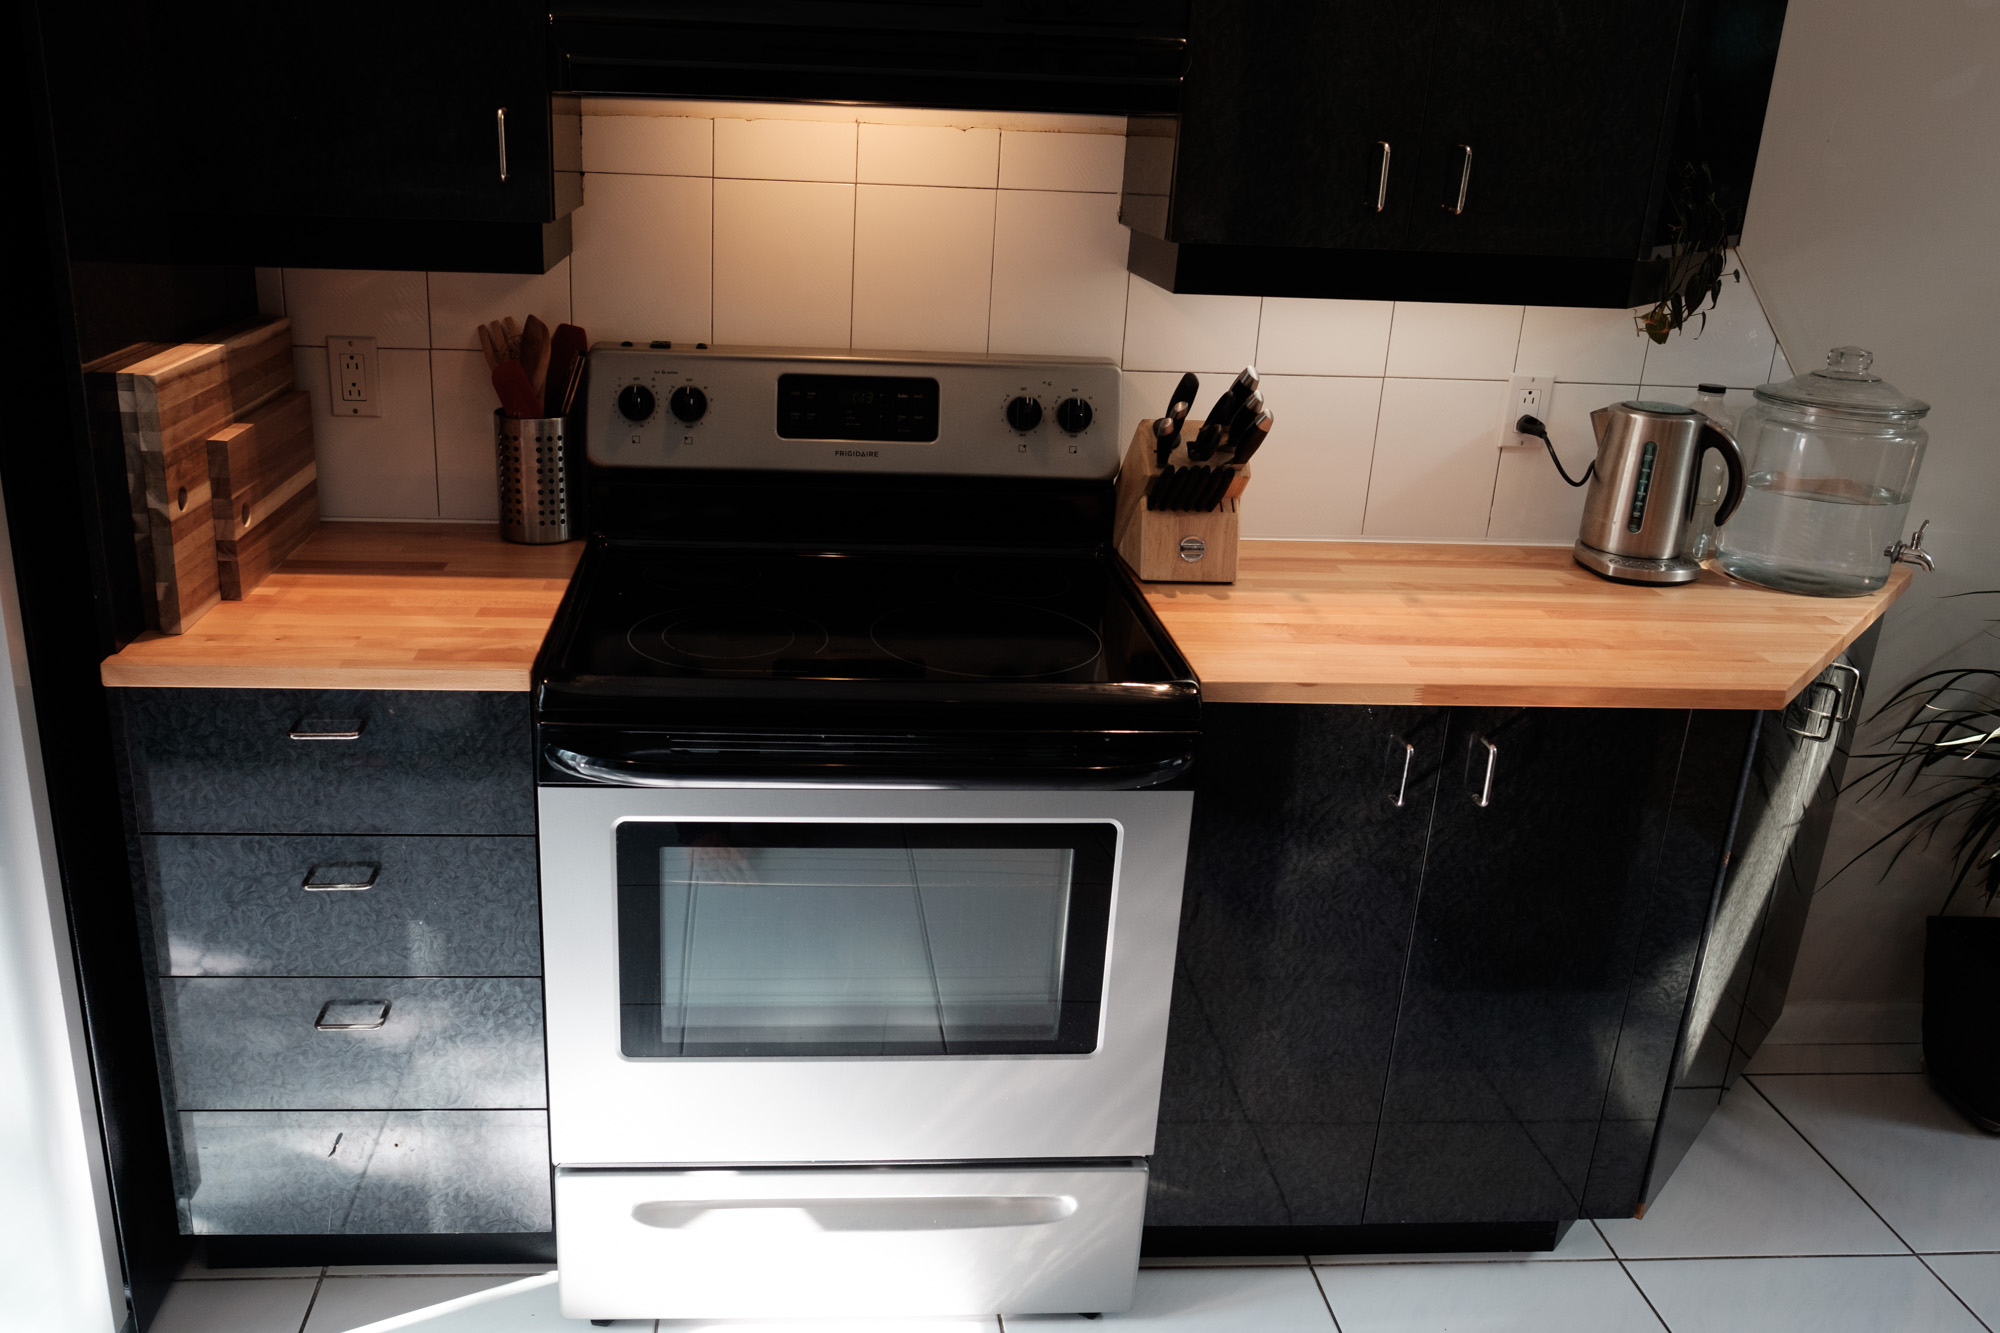
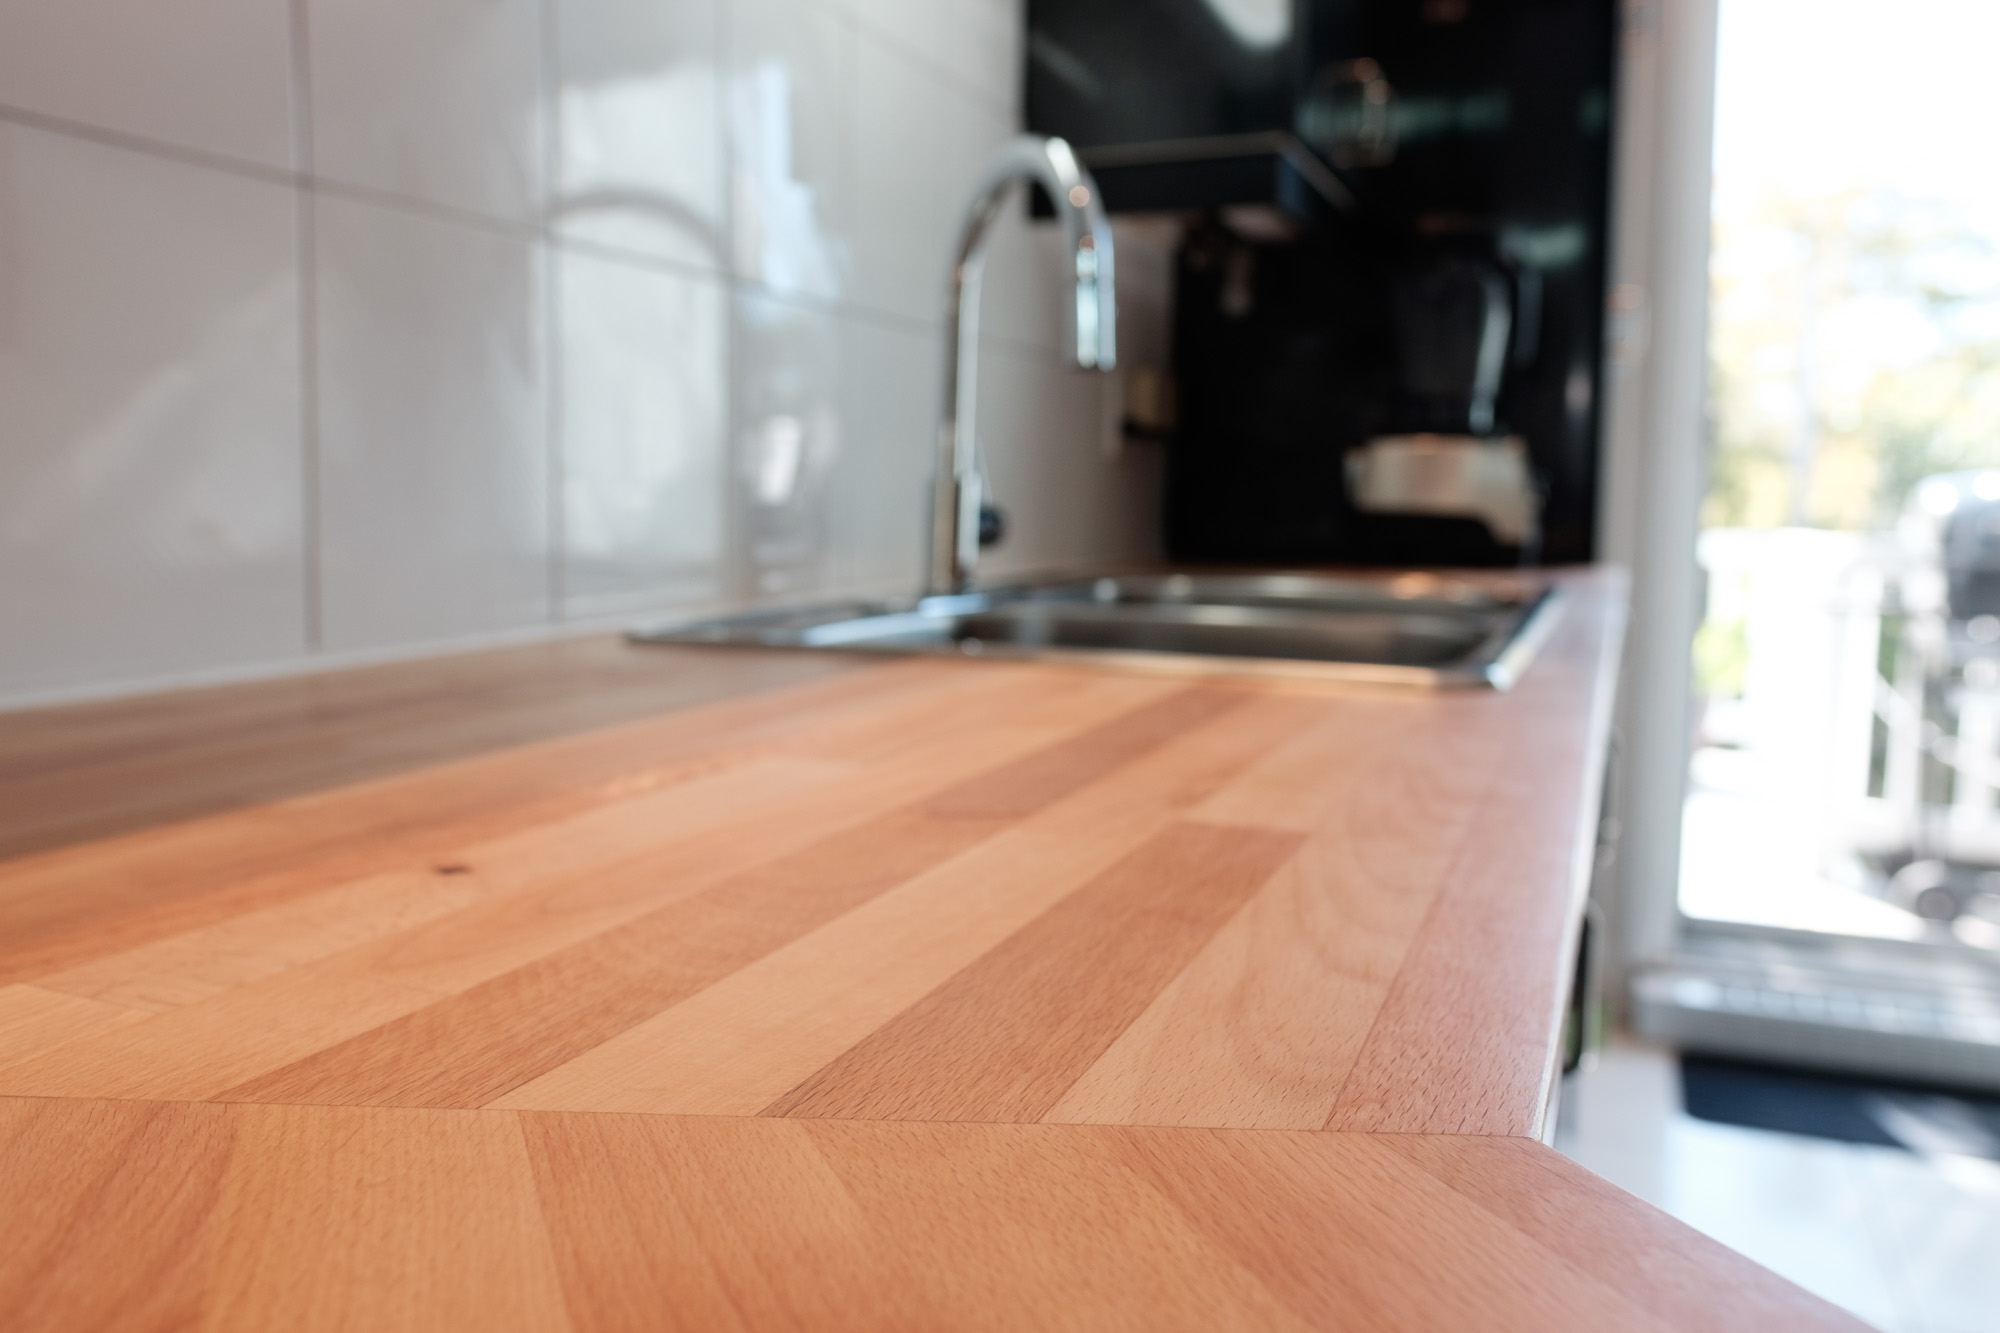
I'm really happy with the end result. It is a huge step up and it makes cooking so much more pleasant.