How I redesigned my living room out of the 70s
A while back, I wrote about how I renovated my kitchen countertops. I went into detail about my hate of melamine. Truth is, I'm on a crusade against melamine. Right after I moved in, I asked my landlord if I could renovate the living room and get rid of the ugly turquoise built-in console that looked like it was coming straight from the 70s.
The plan
The plan was to get rid of the turquoise melamine, bring back the white walls, sand the floors, finish them with oil and build a new wood corner console. The first image is a 3D reconstitution of the old corner console (I lost the original pictures), but yes it was that turquoise and ugly!


Renovations
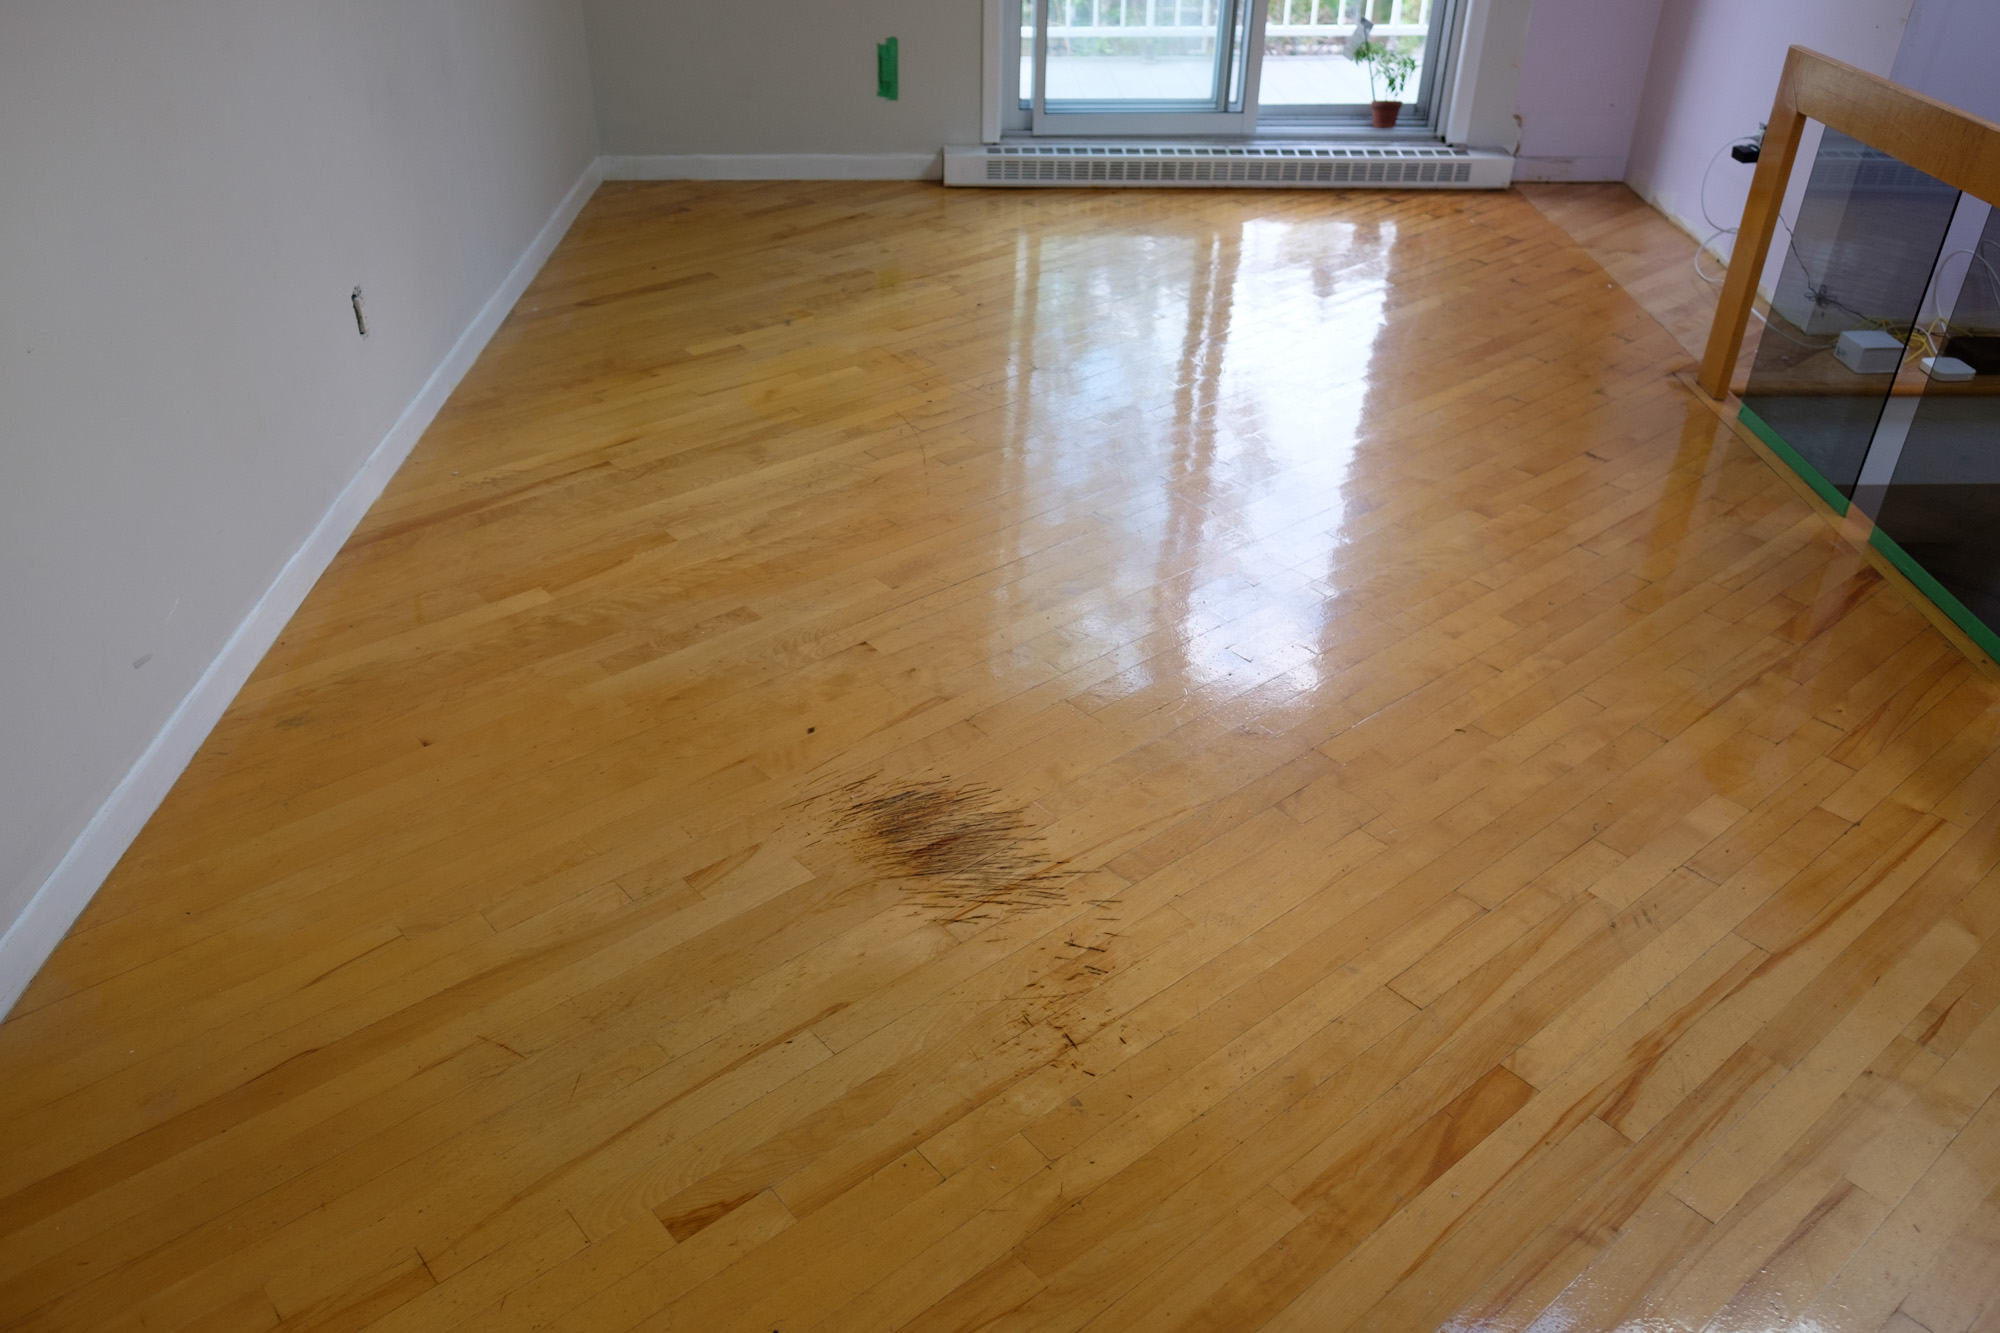
As you can see in the picture below, the old floor was yellowish. It had major damages that hadn't been repaired. And it looked like there was a thin layer of plastic with air bubbles all over it, with scratches and burns beneath it. As if an extra layer of varnish was applied with a paint roller without previously preping the floor.
I did 3 passes of sanding, using 80-100-120 grit successively. Then I applied 5 coats of clear Livos Kunos 244. I make a point of not introducing any armful chemicals (VOCs and SVOCs) when I do renovations or build furniture. That's why I chose this oil.

Oil finishes are an healthy choice that looks wonderful in my opinion. At first, I wanted to keep the whiteness of the maple floor but it is not something that's possible. Oil finishes darken the wood and give it a slightly orange tint. In the end, I really like the warmth it gives to the room, especially during the winter!
Another thing to keep in mind, floor oil finishes can be a pain in the ass to maintain. It takes about a month to fully cure, you might need to add more coats eventually (I didn't saturate the wood with my first 3 coats so I ended up adding 2 more). I think it is worth it though; and it is the easiest finish to do touch-ups on if you ever damage your floor!
I'm very happy with the end result but I did it mostly to learn about the process. Sanding floors is a lot of work; and work that is better left to a professional. It is one thing to sand a piece of furniture, it is a totally different one to sand large surfaces.
Building the corner console
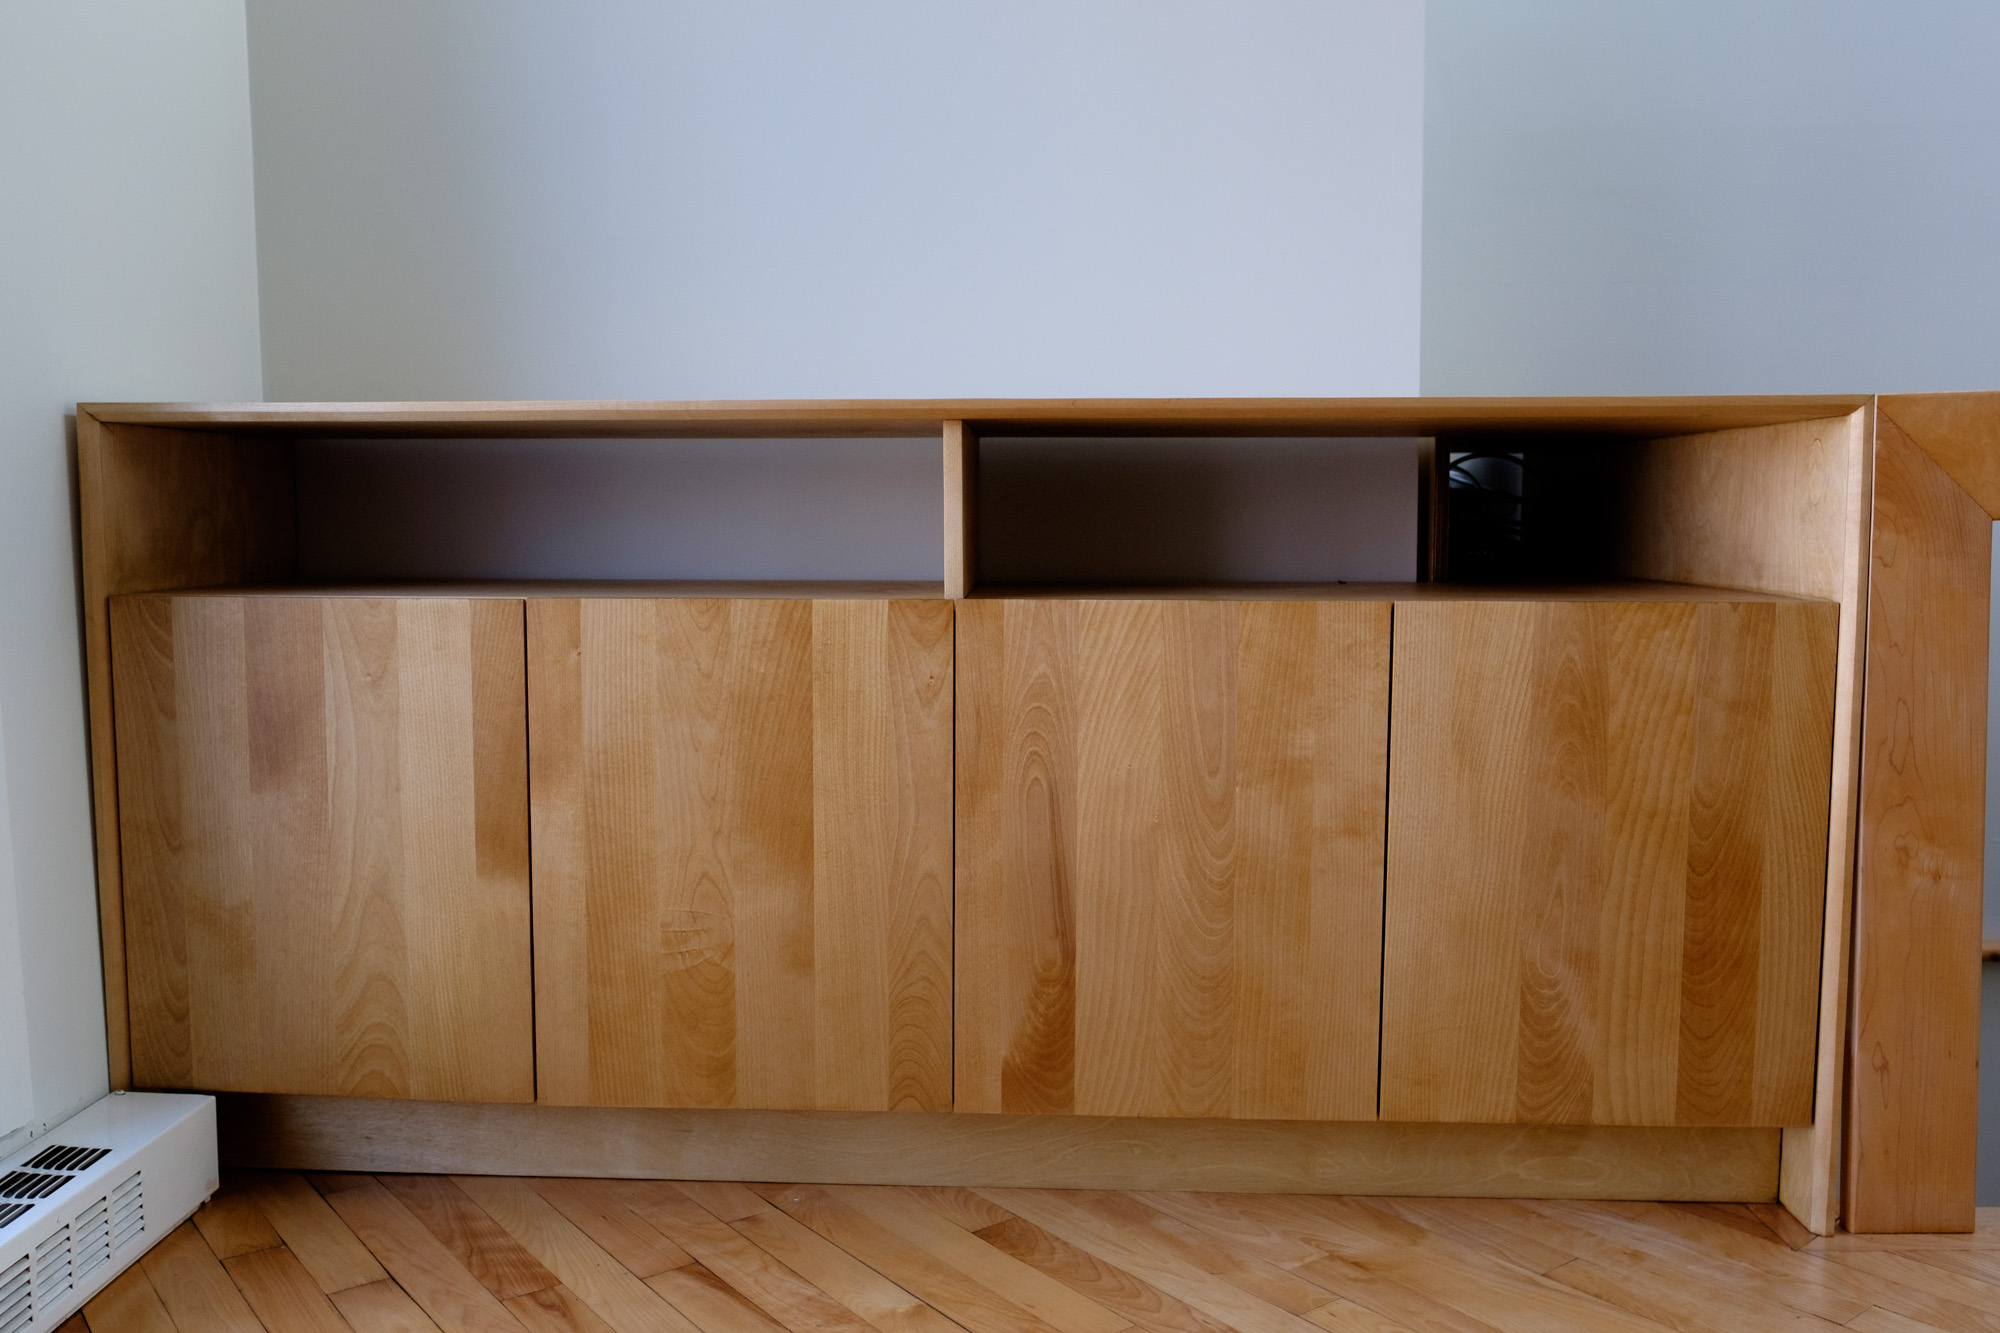
When I designed the TV console with my friend Adrien I really liked the idea of having two levels. I kept that concept but I added doors to hide the content of the bottom section.
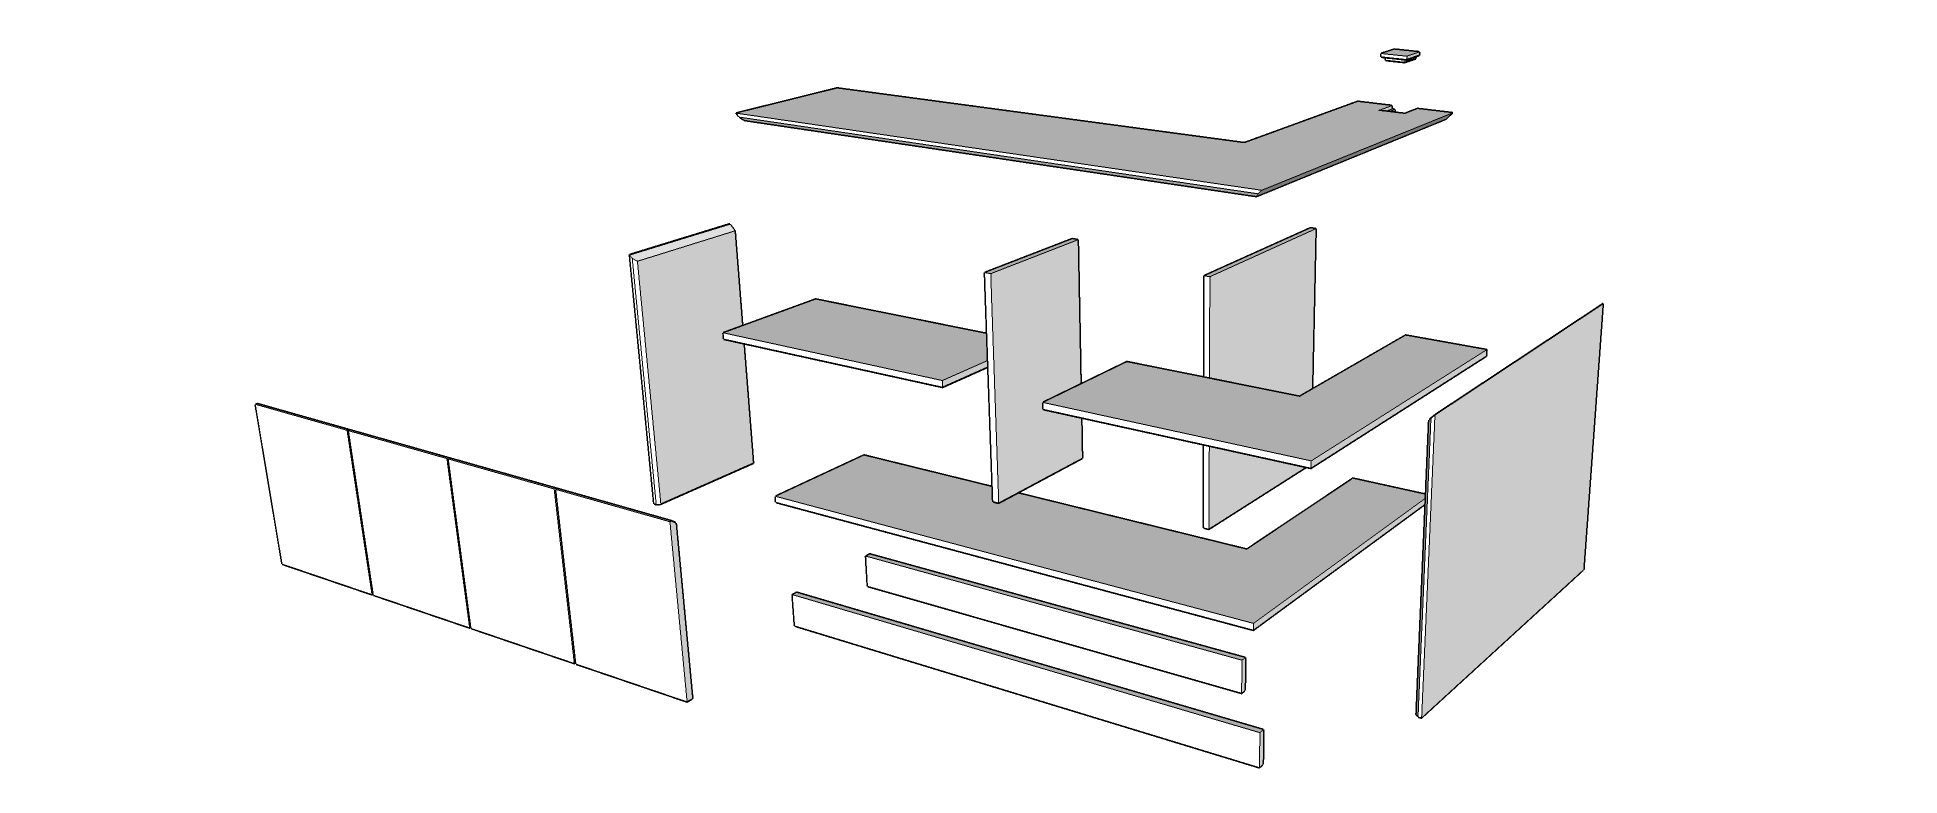
The structure is made of Baltic Birch Plywood with hardwood doors. I added a banding to the plywood to hide its folds and add a bevel. It is a small detail that makes a big difference, the same bevel is repeated on the top of the doors improving their operation. It is a big part of what makes that design clean and simple yet functional.

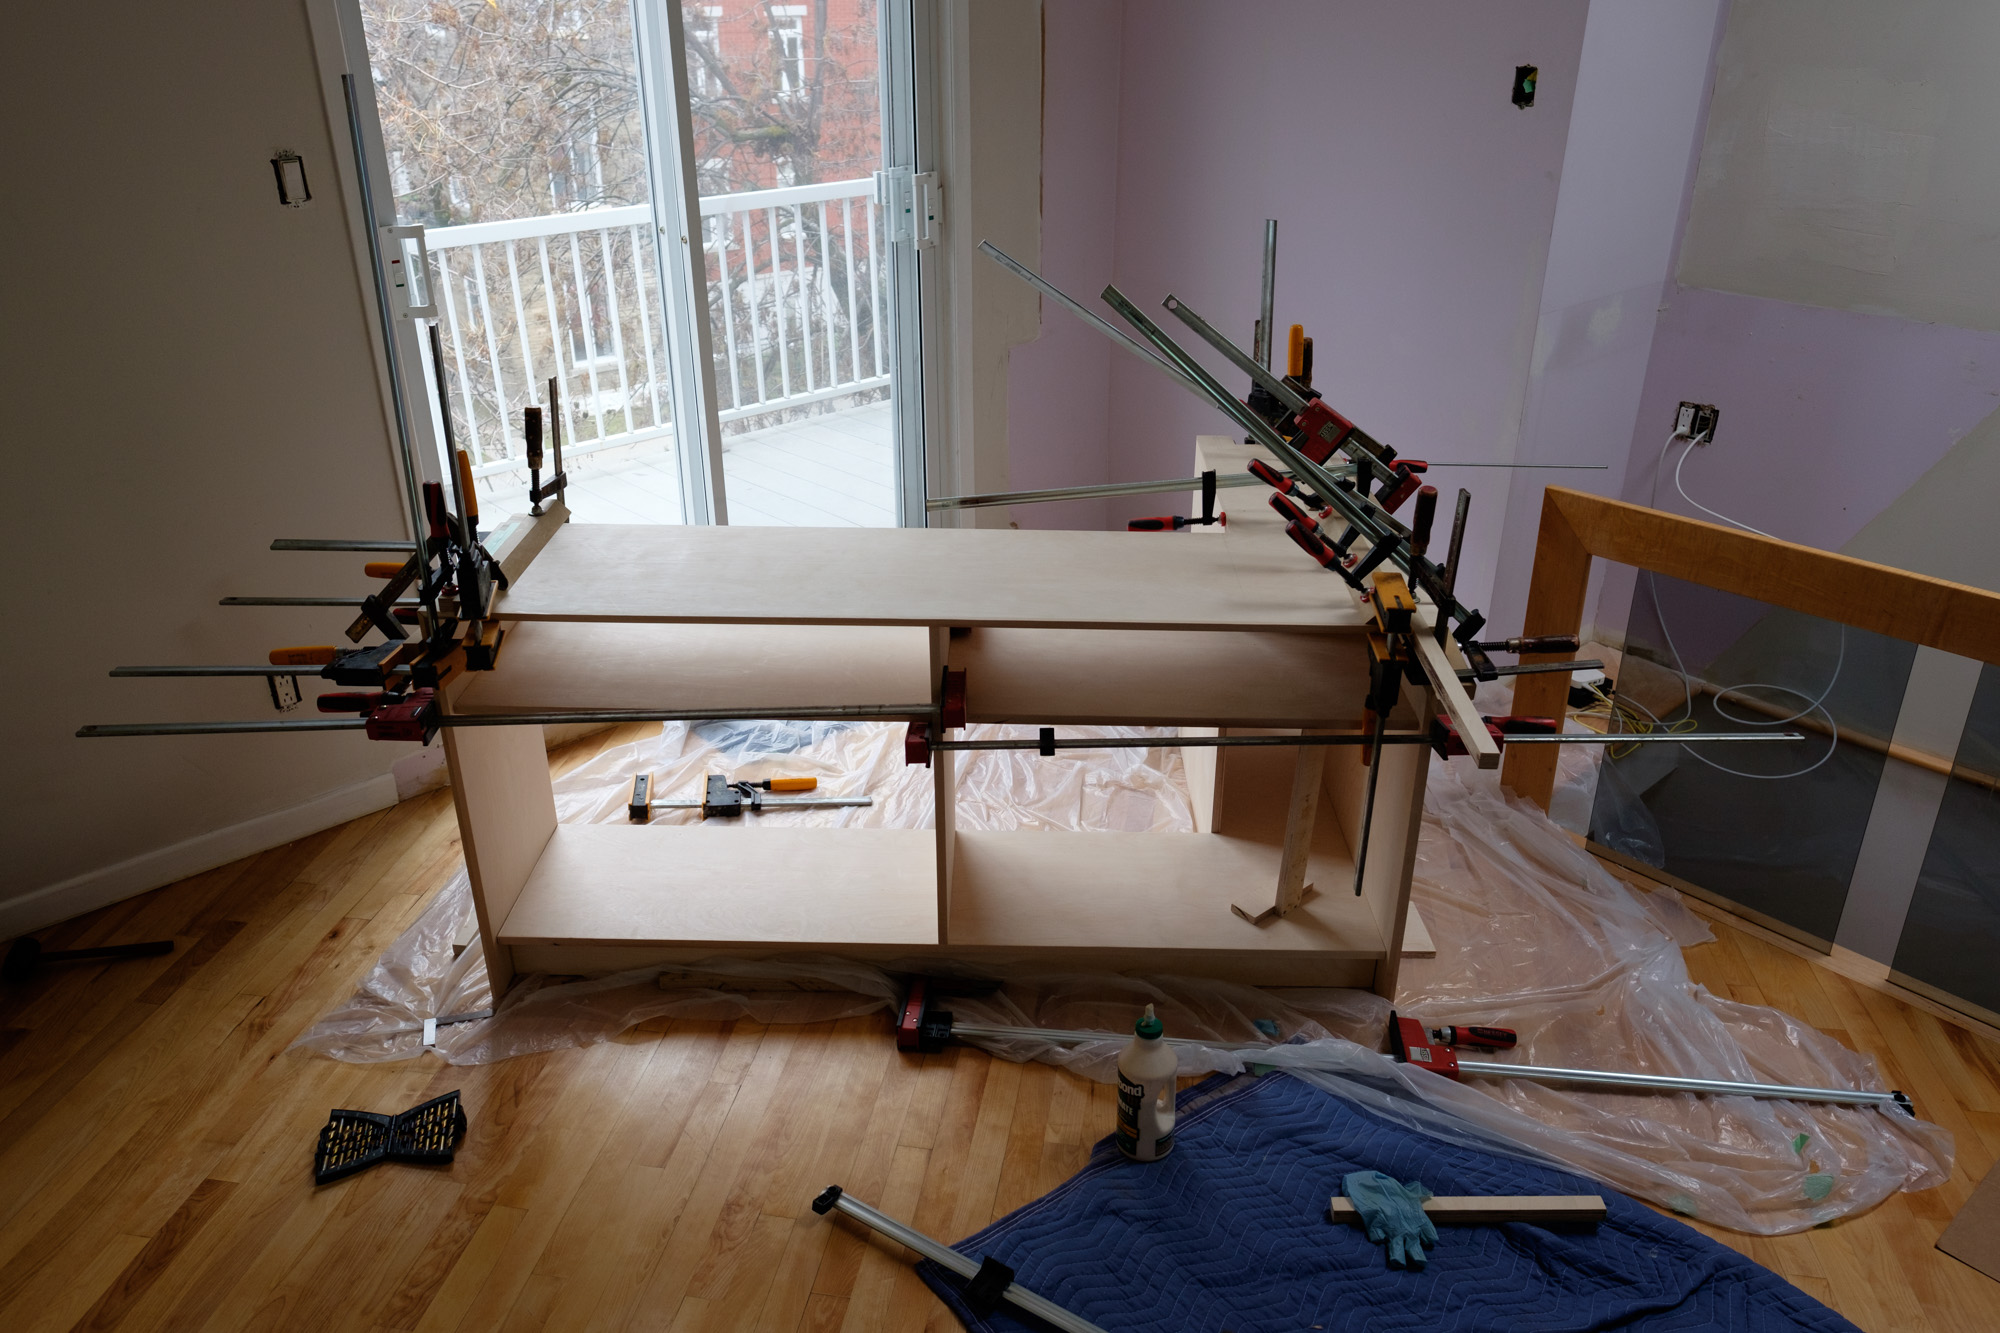
Building custom recessed furniture is very difficult; You must plan for the floor being crooked, the walls not being straight and how you will install the piece of furniture. Because of the size of the unit, I would have had a hard time moving it pre-assembled. So I opted for an on-site assembly and as a result made the structure as simple as possible. The joinery is mostly done with Festool dominos and there is no backing.
The only complicated part really is to assemble everything in a timely fashion without screwing up the 45 degree angles, which arguably I could have done a better job at. I will leave you with couple more pictures :